
 Nick Quirk
 Learning how to upgrade WordPress PHP is one of the highest-return maintenance jobs you can do, because a newer PHP version usually cuts page generation time and closes off known security holes. The upgrade itself takes about two minutes in your hosting panel. The other 90% of the work is checking that your plugins and theme can handle the new version before you flip the switch.
This guide walks through the full sequence we use on customer sites: verify the current version, audit compatibility, stage the change, switch, test, and roll back if something misbehaves.
The short answer
- Open Tools > Site Health > Info > Server in WordPress and note your current PHP version.
- Update WordPress core, every plugin and your theme first.
- Take a full backup (files plus database) and clone the site to staging.
- In your hosting panel, find the PHP version selector (often called MultiPHP Manager, Select PHP Version or just PHP), select PHP 8.3 or 8.4, then click save.
- Test the staging site, then repeat on production and clear all caches.
Which PHP version should WordPress run in 2026?
WordPress officially recommends PHP 7.4 or greater in its requirements documentation, but that is a floor, not a target. PHP 7.4 stopped receiving security fixes back in November 2022, so running it in 2026 means running unpatched code on a public server.
Check the official PHP supported versions page before you decide. As of 2026 the sensible picks look like this:
- PHP 8.3: the safest default for most sites, with broad plugin support and security fixes running into late 2027.
- PHP 8.4: a good choice for well-maintained sites, and typically 5% to 15% faster than 8.1 on WordPress workloads.
- PHP 8.5: fine for developers and lean sites, but wait a few months if you depend on older commercial plugins.
- PHP 7.x or 8.0: end of life. Treat any site still on these as an active security task.
If you sell online, be a little more conservative. WooCommerce stacks have more moving parts, so we usually move WooCommerce sites one minor version at a time rather than jumping from 7.4 to 8.4 in a single step.
Step 1: Find your current PHP version
The fastest route is inside WordPress itself. Go to Tools > Site Health, open the Info tab, expand Server, and read the value next to PHP version. WordPress will also display a nag on the dashboard if your version is below the recommended minimum.
Two alternatives if you cannot reach the admin area:
- Look for a PHP version display in your hosting dashboard, which is usually on the domain or website overview screen.
- Upload a small file containing
<?php phpinfo();to your web root and visit it in a browser, then delete it immediately afterwards. Our guide on uploading files to WordPress covers the file manager and SFTP methods.
Step 2: Audit compatibility before you touch anything
This is the step most tutorials skip, and it is the reason people end up on Reddit asking why their site went white after a PHP upgrade. Old code does not fail politely on PHP 8; it throws fatal errors on things that were only warnings in PHP 7.
Work through this audit list first:
- Update everything. Core, plugins and your theme. A plugin from 2019 that has not shipped an update is your biggest risk. Our walkthrough on updating a WordPress theme safely applies here too.
- Check the “Tested up to” data. Any plugin whose last update predates PHP 8.1 deserves a replacement search.
- Enable debug logging. Set
WP_DEBUGandWP_DEBUG_LOGto true in wp-config.php for a week and read the log. Deprecation notices tell you exactly which files will break. - Scan custom code. Removed functions like
create_function()and the oldmysql_*family are common culprits in inherited child themes. - Inventory anything homegrown. Custom snippets in functions.php, one-off mu-plugins and old API integrations rarely get compatibility testing from anyone but you.
Step 3: Back up, then stage
Take a full backup of files and database, and confirm you can actually download it. Then clone the site into a staging environment and change PHP there first. On managed platforms this is a one-click clone; on shared hosting you may need a plugin like WP Staging.
Related reading: How to Add Meta Keywords in WordPress Without a Plugin (2026 Guide).
For a closer look at this topic, see our guide: How to Find Out Who Hosts My WordPress Site: 6 Ways That Actually Work.
Staging matters because PHP switches are global to the account on many plans. If a fatal error appears on production, every visitor sees it until you revert.
Step 4: Change the PHP version in your host panel
The control is in your hosting account, never in WordPress. Where you find it depends on the panel.
cPanel hosts
Log in, then open MultiPHP Manager under the Software section. Tick the domain, choose the version from the dropdown, and apply. Some hosts instead expose Select PHP Version, which also lets you enable extensions such as imagick or intl.
Custom dashboards (no cPanel)
Hosts that run their own panel, including most managed WordPress providers, put the setting on the site detail screen. The wording varies: Hostinger uses PHP Configuration under the hPanel advanced menu, Bluehost exposes it in the hosting dashboard, and GoDaddy hides it under the server or settings tab for the plan. If you cannot find it, ask support to switch the version and confirm which extensions are loaded. Our support team handles this on request in a few minutes.
VPS and self-managed servers
You are installing packages rather than picking from a list. Install the new PHP-FPM package, update your nginx or Apache handler to the new socket, restart both services, and keep the old version installed until testing passes. If that sounds like more work than you signed up for, a managed PHP environment removes the server admin entirely.
Step 5: Test the site properly
Reload Site Health to confirm the new version registered, then work through the functions that actually earn money on your website:
- Front page, a blog post, an archive and a search results page.
- Contact and checkout forms, including a real test submission.
- Login, registration and any membership or paywall gate.
- Image uploads and the media library, which depend on PHP extensions.
- Cron-driven tasks: scheduled posts, backups, abandoned cart emails.
Clear every cache layer afterwards, including object cache, page cache and CDN. Sites running LiteSpeed Cache should also purge OPcache, since stale compiled files can produce errors that look like a PHP problem but are not.
Step 6: If something breaks, roll back
Reverting is the same dropdown in reverse and usually takes under a minute. Switch back to the previous version, confirm the site loads, then read your error log to identify the exact plugin file and line that failed.
From there you have three options: update or replace the offending plugin, patch the code if you own it, or contact the developer with the error message. Do not stay on an unsupported version indefinitely because one plugin is stubborn; that trade puts your whole site at risk. High-traffic publishers on magazine hosting plans often keep a permanent staging clone precisely so PHP testing never touches live traffic.
What people get wrong about PHP upgrades
Two myths show up constantly in Reddit threads. The first is that upgrading PHP updates WordPress; it does not, they are separate things. The second is that cheap hosting means old PHP, which is no longer true: plenty of budget WordPress plans now ship PHP 8.3 by default, and if yours is stuck on 7.4 with no selector, that is a reason to move hosts rather than a technical limitation.
Frequently Asked Questions
How to upgrade the PHP version of WordPress?
You change it in your hosting control panel, not in WordPress, and it takes roughly 2 minutes. Update plugins and take a backup, then use MultiPHP Manager in cPanel or the PHP setting in your host dashboard to select PHP 8.3 or 8.4, save, and retest the site.
Should you update PHP on WordPress?
Yes. Versions below PHP 8.1 no longer receive security patches, and moving from 7.4 to 8.x commonly cuts server response time by 20% or more on the same hardware. The only reason to delay is an unpatched plugin, and that is a temporary problem worth solving.
How do I upgrade WordPress to the latest version?
Go to Dashboard > Updates and click the update button, which typically finishes in under 60 seconds. Core updates are separate from PHP updates, so do the WordPress update first, then change the PHP version afterwards.
How to update PHP to the latest version?
Pick a version that still has active security support (check php.net before choosing), then select it in your host panel or install the matching PHP-FPM package on a VPS. Skipping straight to the newest release is fine for lean sites, but sites with commercial plugins do better one version behind the bleeding edge.
Want your PHP version handled for you?
We keep every site on a supported PHP release, with staging and one-click rollback included, so upgrades stop being a thing you worry about. See how our PHP environment works or ask our team to audit your current version.
Related Articles
 WordPress Hosting
Can Netlify Host WordPress? The Straight Answer for 2026
Can Netlify host WordPress? Not directly. Here's how the static and headless workarounds actually work in 2026, what breaks, and what they really cost.
 Nick Quirk
 WordPress Hosting
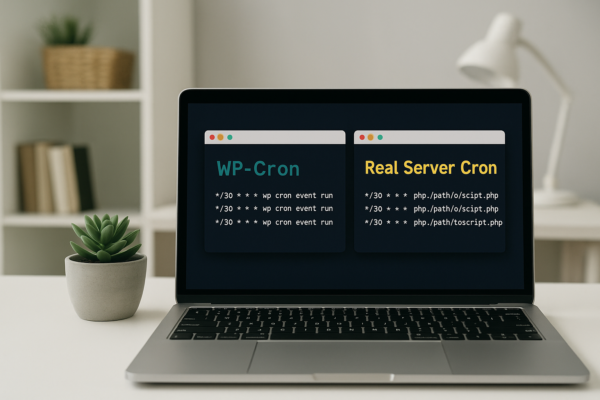
Managing Cron Jobs in WordPress: WP-Cron vs. Real Server Cron
Managing cron jobs in WordPress: how WP-Cron works, why it misses schedules, and how to switch to a real server cron with WP-CLI in 2026.
Nick Quirk
 WordPress Hosting
Hosting Considerations for WordPress Multi-Site (WPMU) Networks
What WordPress Multisite hosting actually needs in 2026: database limits, PHP workers, wildcard SSL, per-site backups and when to split the network.
Nick Quirk